

Macbook M2 版本 如何安裝連接 顯示器
ZAC410 USB Type-C轉HDMI 4K60 PD 數位影音線材 功能介面介紹
- 即插即用、無需另外設定
- 4K 60Hz高清,超高清影片
- PD 3.0快充協議 可邊充電變觀看
- 可以播放Disney+、Netflix、FOX+、Catchplay等HDCP加密影片
- HDMI埠 (最高支援 4K UHD 3840×2160 60Hz, 1920×1080 240Hz)
- 適用USB Type-C埠的MacBook Pro/Air、iMac、iPad Pro/Air、Windows 筆電、任天堂Switch
Macbook Air M2 使用 ZAC410 安裝連接顯示器
需準備
1. 喆安 ZAC410 USB Type-C轉HDMI 4K60 PD 數位影音線材
2. 顯示器 * 1台
3. Macbook M2
安裝無須下載任何驅動程式,連接後即可鏡像投影
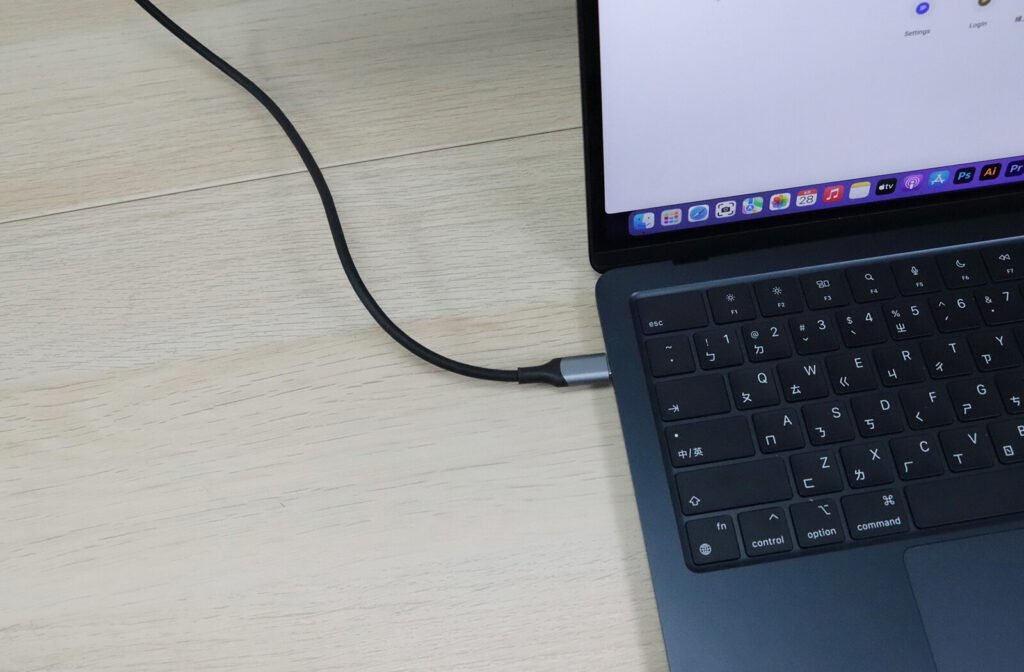
1. 將 ZAC410 Type-C頭 插入 Macbook M2 Type-C插孔
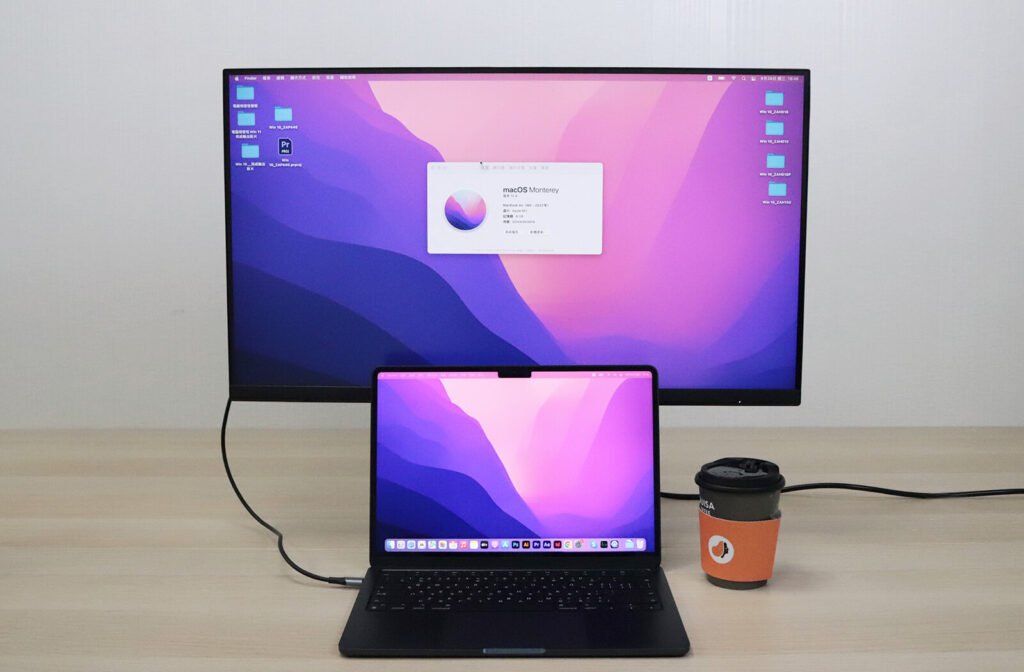
2.將ZAC410 HDMI頭 插入顯示器 HDMI 插孔 就即可單螢幕投影囉

畫面延伸步驟
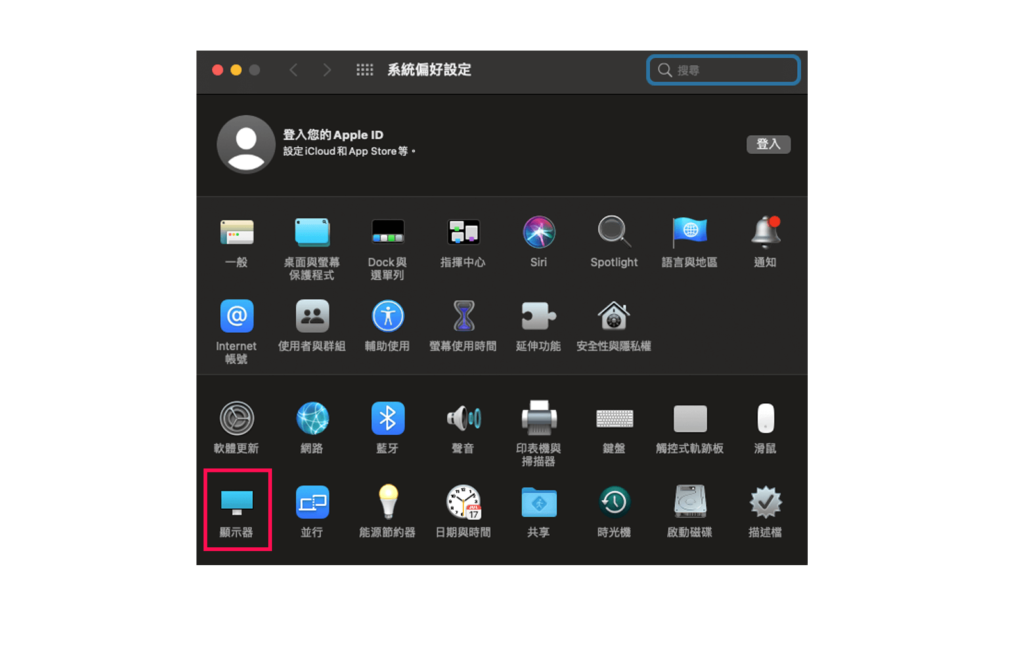
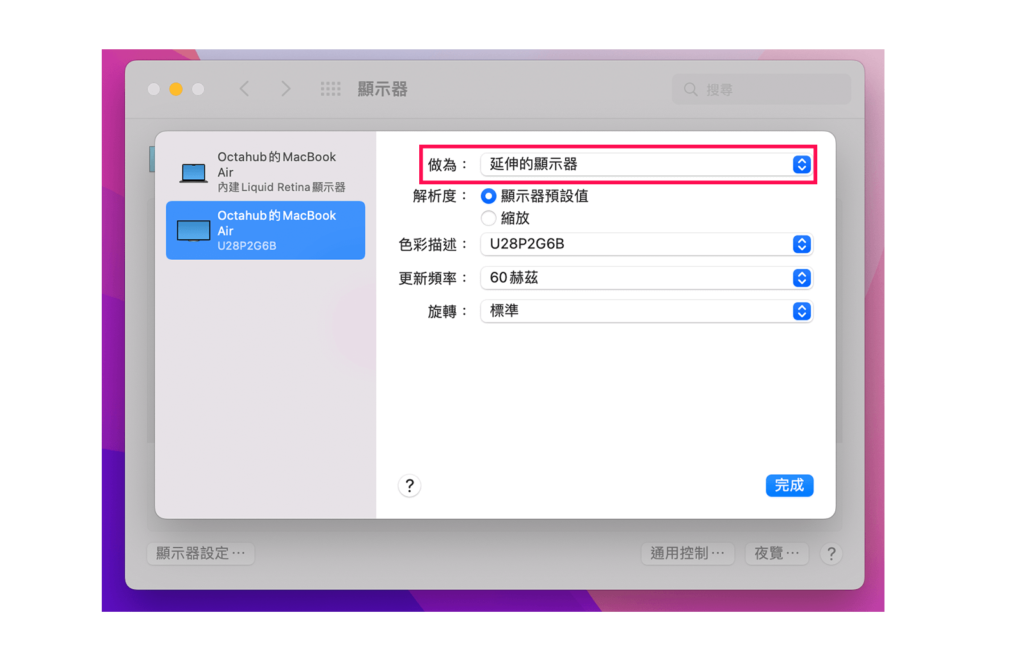
1.首先點擊桌面左上角蘋果icon -> 系統偏好設定 -> 選顯示器
2.選擇 「顯示器設定」
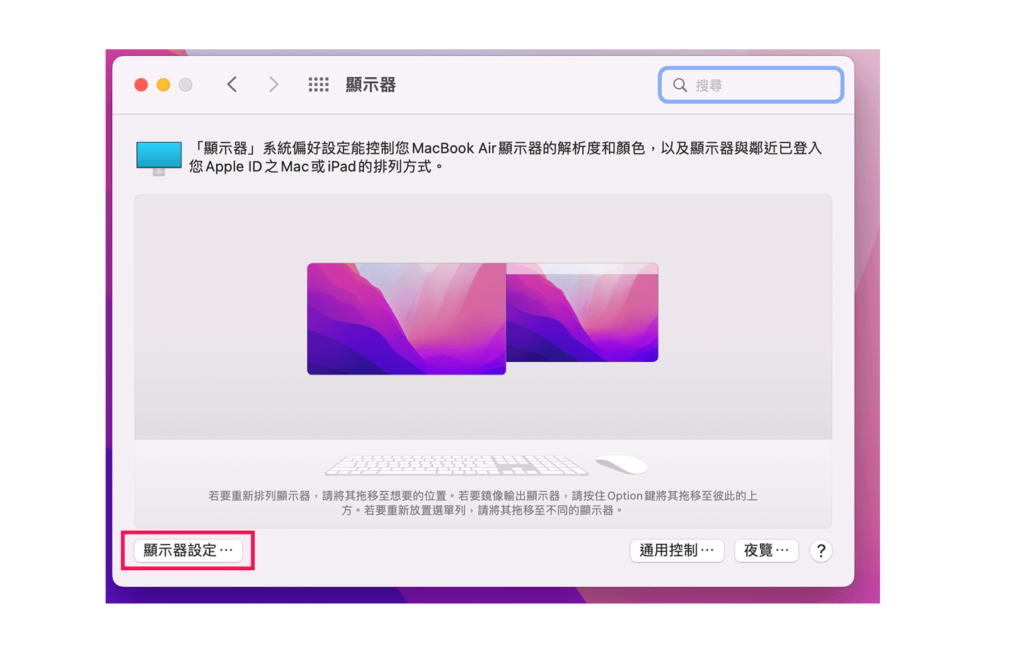
3.左側選擇要延伸的顯示器型號 -> 改為 「延伸的顯示器」就完成囉!

閱讀相關文章: ZAP440 使用說明書 – Macbook M2 如何 連接顯示器?
閱讀相關文章: ZAP470 使用說明書 – Macbook M2 如何連接 顯示器 ?
推薦文章
相關產品
SET THE PRIMARY AND SECONDARY MONITOR
- Right-click on your desktop and select “Display”. At the top of the resulting dialogue box, your available monitors appear as blue, numbered boxes. Each box represents a monitor (e.g. box “1” corresponds with the left monitor and box “2” corresponds with the right monitor).
- From the display, select the monitor you wish to be your main display.
- Check the box that says “Make this my main display.” The other monitor will automatically become the secondary display.
- When finished, click [Apply].
SET THE MONITOR RESOLUTION
- Right-click on your desktop and select “Display”. At the top of the resulting dialogue box, your available monitors appear as blue, numbered boxes. Each box represents a monitor (e.g. box “1” corresponds with the left monitor and box “2” corresponds with the right monitor).
- From the display, select the monitor you wish to adjust.
- Click the “Advanced display settings” link (located at the bottom of the dialogue box).
- Click the “Resolution” drop-down menu and select your desired resolution.
- When finished, click [Apply].