手機數位影位擴充基座 | 功能介紹
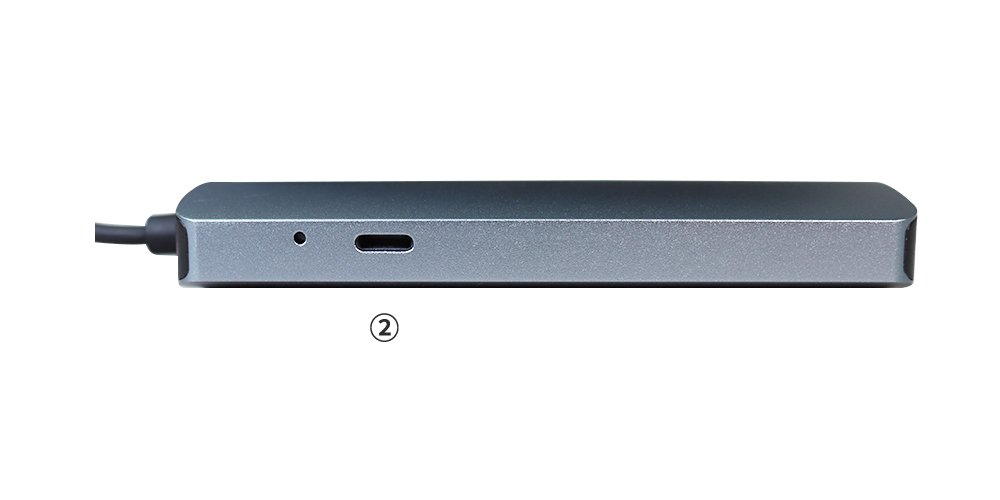
① USB (A) 
可連接滑鼠、鍵盤、USB隨身碟、硬碟等…

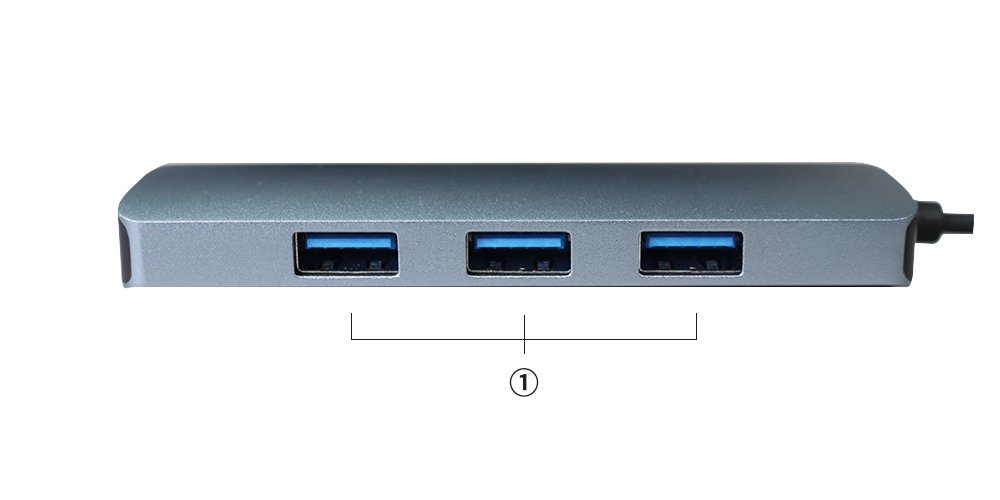
② 充電埠
⚠️ 可回充手機電源
⚠️ 需接上此 Lighting 電源 才能 手機投影至螢幕/顯示器
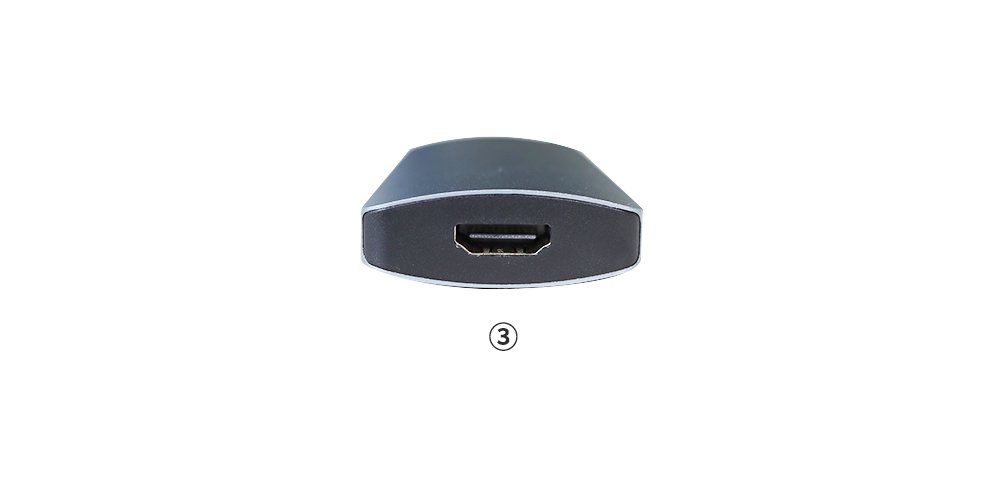
③ 影音輸出埠 
最高支援 1080P 高畫質
數位影位擴充基座安裝步驟
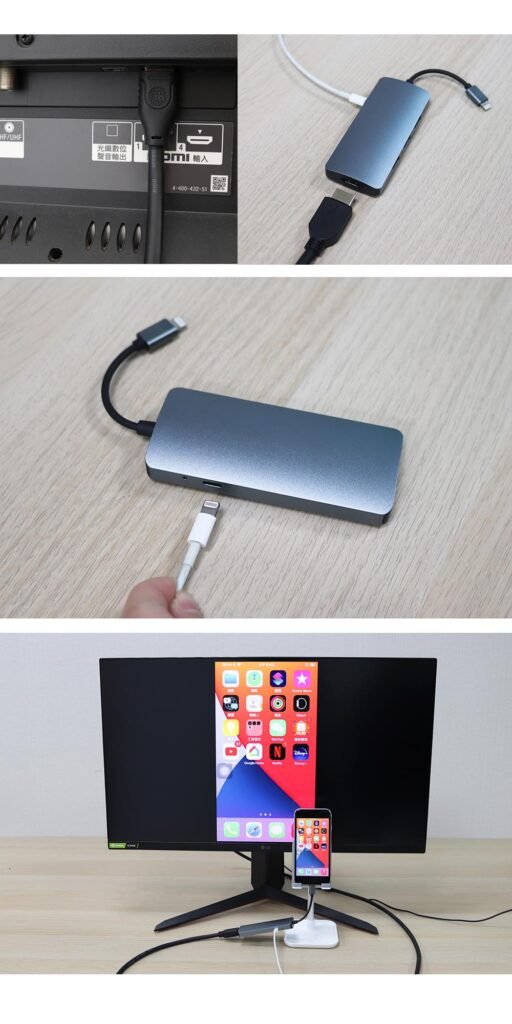
安裝教學
⚠️ 首先不要連接 蘋果手機 或 平板
1. 請用 HDTV 影音線材,連接擴充基座的輸出埠和螢幕/電視機的HDTV輸入
2. 並接上 Lighting 充電埠 電源 🔌
⚠️ 若使用原廠 PD 線 (TYPE C 轉 Lighting) 必須配合使用原廠 20W 充電頭
⚠️ 使用 PD 線 請勿使用副廠 20W 充電頭
3. 接上電源後,再連接上手機,畫面即可傳送到螢幕/電視機
無須安裝任何驅動程式,隨插即用
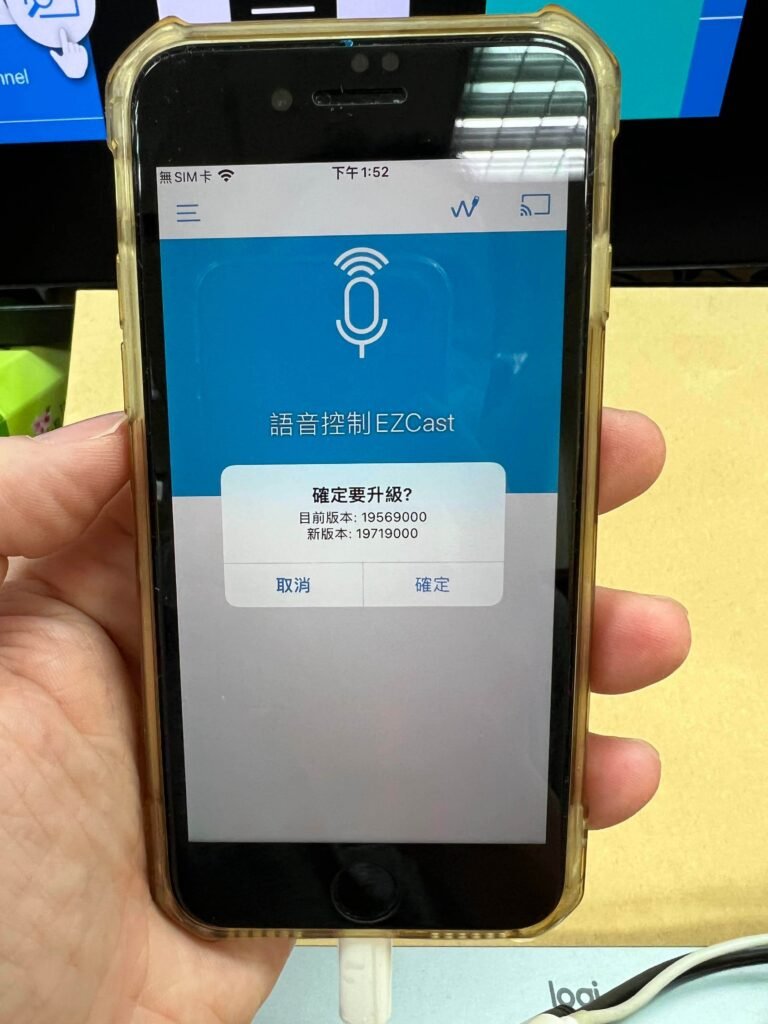
數位影位擴充基座 轉接器 切換到 軟體升級模式
讓 數位影位擴充基座 轉接器接上電源,不連接手機,然後用退卡針刺入擴充轉接器上的小孔,螢幕上會顯示軟體升級教學

掃描開機畫面上的 QRCode 下載 EZCast App
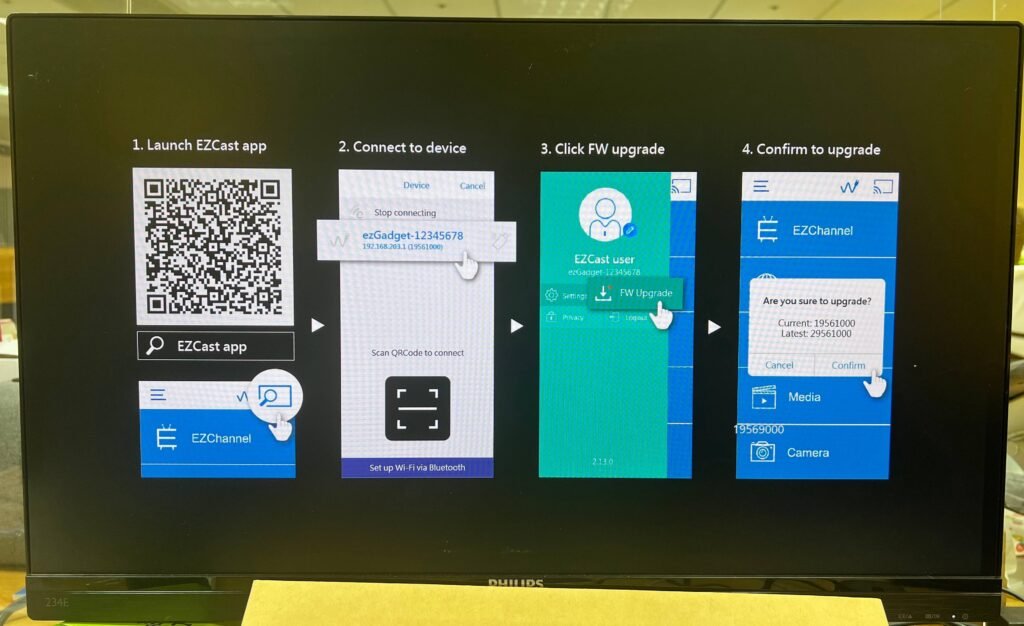
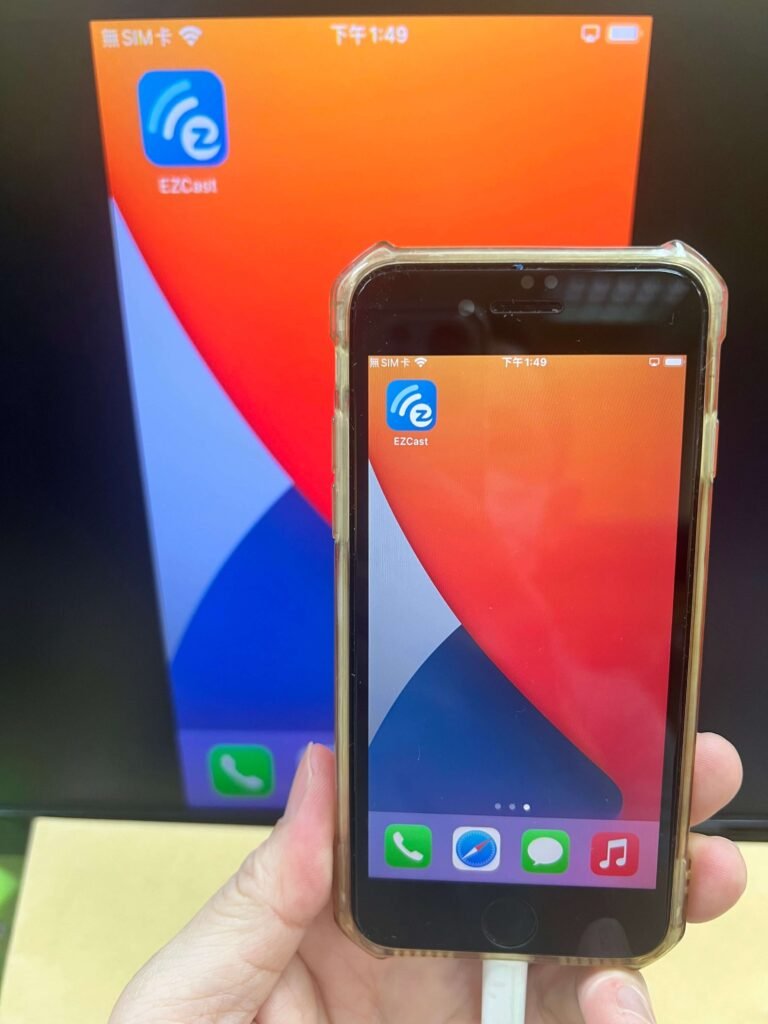
點選右上角 「第二個按鍵」 讓 App 連上擴充轉接器
第二個按鍵長的有點像 W
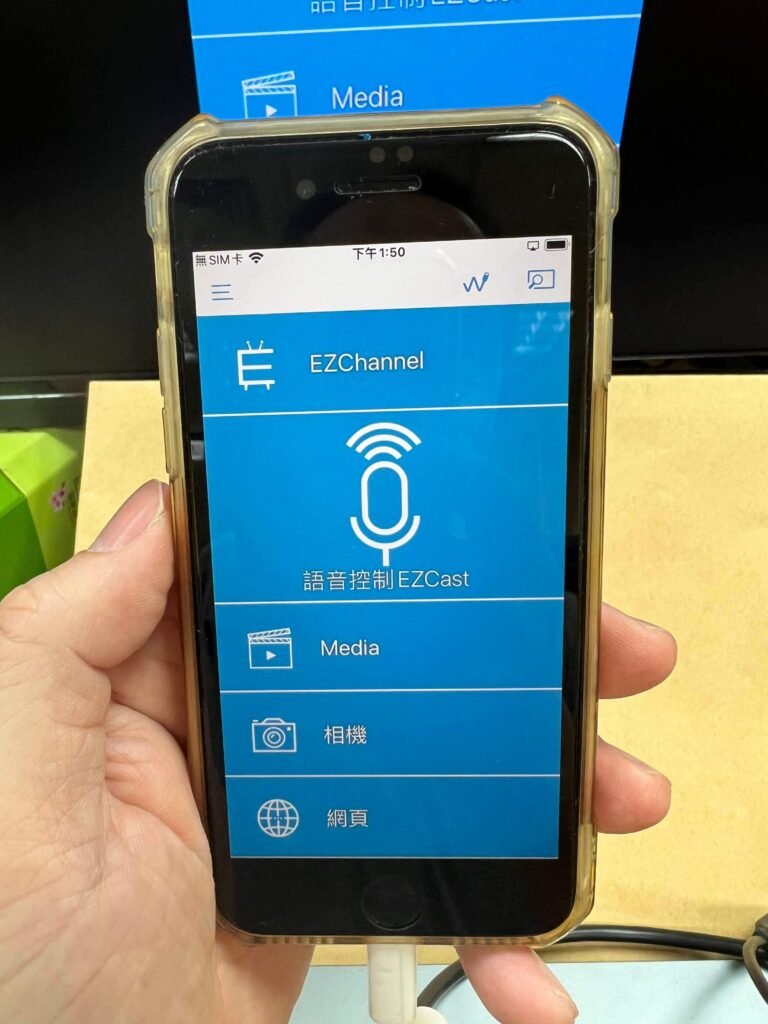
⚠️ 軟體升級之前 擴充轉接器請接上電源 ⚠️升級過程不能斷電

如何連接 USB 隨身碟?
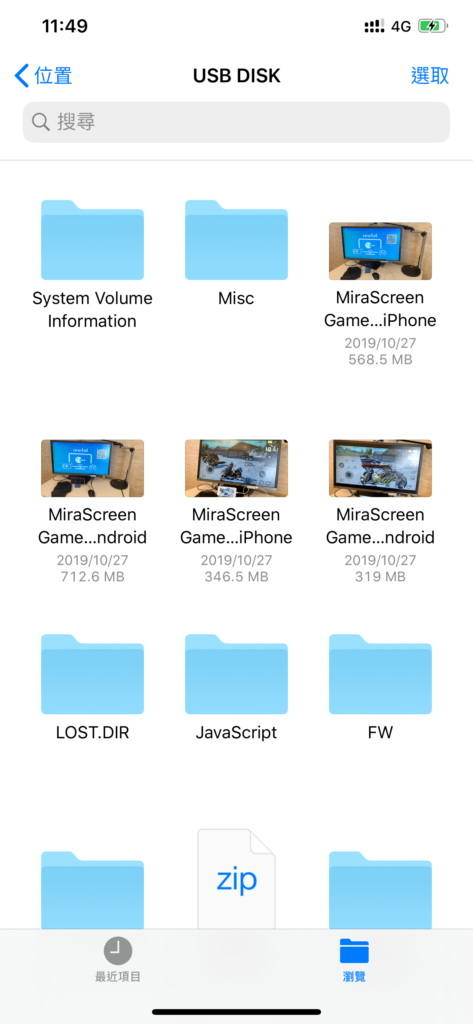
透過 「檔案」APP 連接 USB 隨身碟
透過擴充基座連接 USB 隨身碟之後,iPhone/iPad 就可以使用「檔案」APP來讀寫儲存在外接USB隨身碟上的檔案
- 連接 USB 隨身碟 : 請把隨身碟插擴充基座任一USB埠
- 若要檢視 USB隨身碟 裝置內容,請點一下螢幕底部的「瀏覽」,然後點一下「位置」下方的裝置名稱。如果沒有看到「位置」,請再點一下螢幕底部的「瀏覽」。


如何顯示USB 滑鼠鼠標?
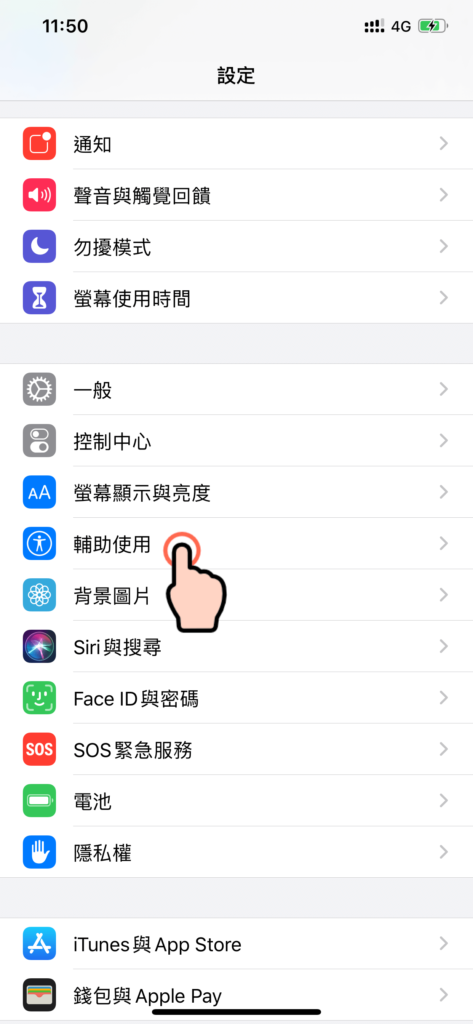
將USB滑鼠透過 擴充基座的 USB埠,連接到 iPhone/iPad。
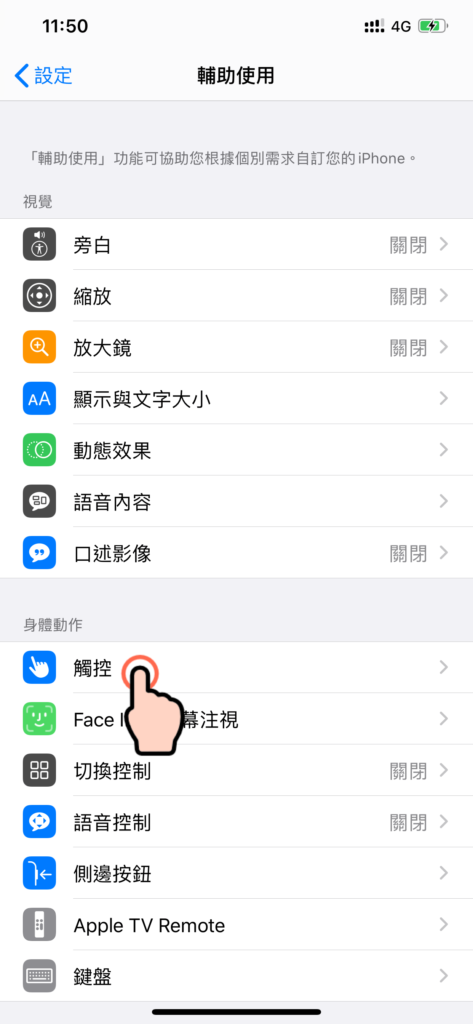
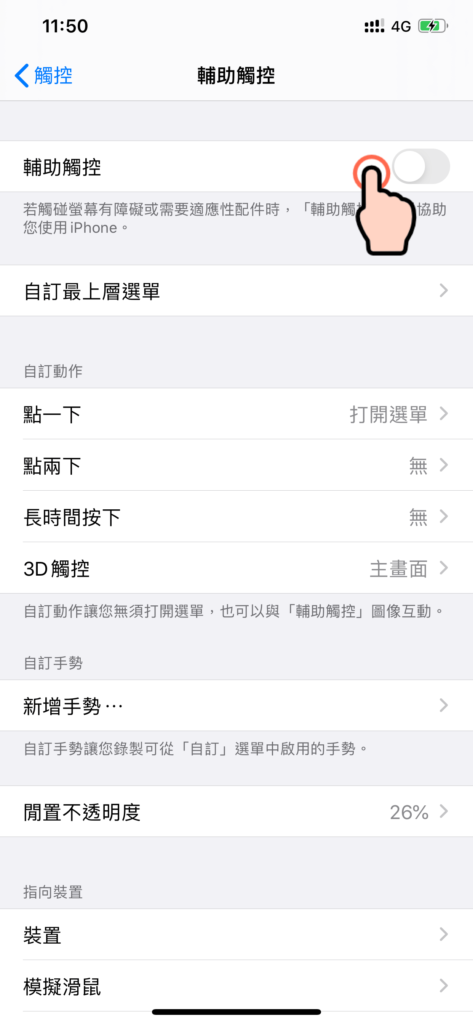
請前往 「設定 → 輔助使用 → 觸控 → 輔助觸控 → 然後選擇 「總是顯示選單」

影片實測記錄
閱讀相關文章: 別急著升 iOS15.4 ! 升級後 iPhone 擴充配件還能不能用?
閱讀相關文章: iPhone 秒變電腦 超簡單 ? 還可以使用滑鼠鍵盤 !
推薦文章
SET THE PRIMARY AND SECONDARY MONITOR
- Right-click on your desktop and select “Display”. At the top of the resulting dialogue box, your available monitors appear as blue, numbered boxes. Each box represents a monitor (e.g. box “1” corresponds with the left monitor and box “2” corresponds with the right monitor).
- From the display, select the monitor you wish to be your main display.
- Check the box that says “Make this my main display.” The other monitor will automatically become the secondary display.
- When finished, click [Apply].
SET THE MONITOR RESOLUTION
- Right-click on your desktop and select “Display”. At the top of the resulting dialogue box, your available monitors appear as blue, numbered boxes. Each box represents a monitor (e.g. box “1” corresponds with the left monitor and box “2” corresponds with the right monitor).
- From the display, select the monitor you wish to adjust.
- Click the “Advanced display settings” link (located at the bottom of the dialogue box).
- Click the “Resolution” drop-down menu and select your desired resolution.
- When finished, click [Apply].


