Mac 如何 延伸桌面 外接雙螢幕
您知道該如何使用 Mac 延伸桌面 外接雙螢幕嗎?
✅ 有 HDMI 埠 👉 使用一條 USB-C 轉 HDMI 線, 連接 Mac 的 USB-C 埠和螢幕, Mac 的 HDMI 埠則連接另一個螢幕
✅ Mac型號 支援MST ❌ 沒有 HDMI 埠 👉 使用有支援 macOS MST的 USB-C Hub, 連接 Mac 的 USB-C 埠和兩個螢幕
❌ Mac型號 不支援MST ❌ 沒有 HDMI 埠 👉 使用兩條 USB-C 轉 HDMI 線, 分別連接 Mac 的兩個 USB-C 埠和兩個螢幕
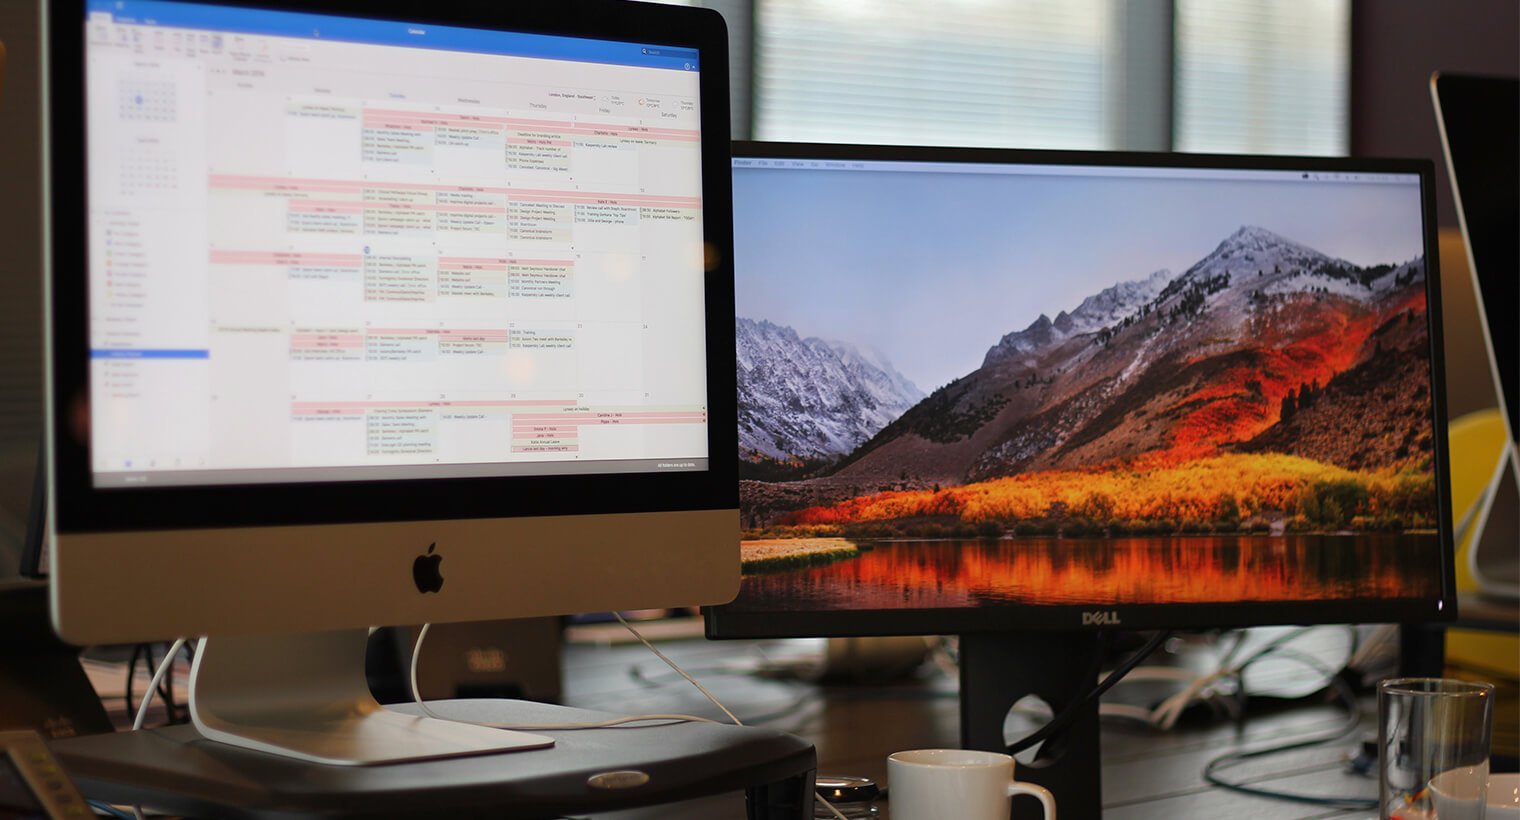
How To Add A Extra Monitors On A iMac
Most apple computers have a video out to add extra monitors. Most people don’t know for less than $20 you can add that old or new monitor to your set up. Mac mini’s you can add 2 monitors, iMac and MacBook Pros normally 2 monitors plus the included screen, The only issue I ever have is when you move the computer the adapters comes loose and you have to firmly press back in.
See you on the next one, peace!
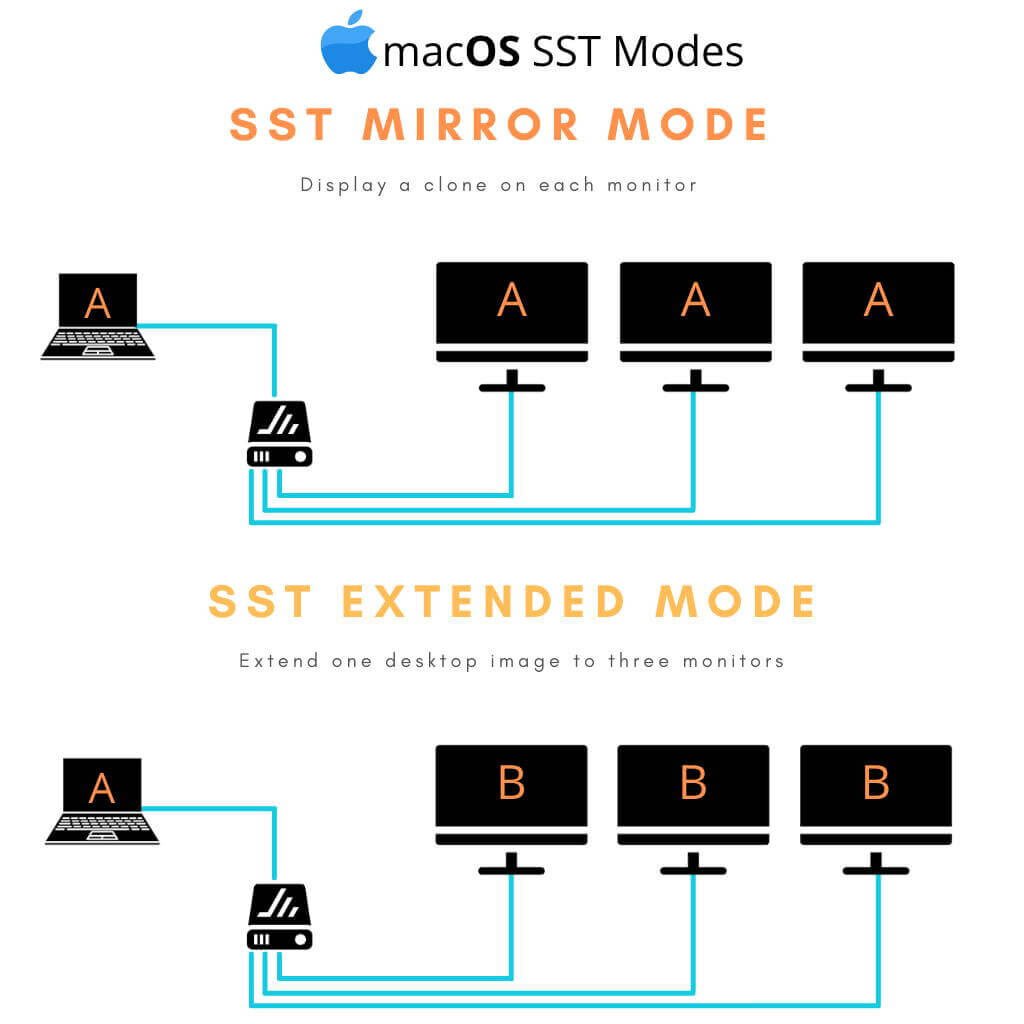
MST (Multi-Stream Transport) 多串流傳輸是什麼?
MST 是 DisplayPort 1.2 及更新版本的一項功能:
允許透過單一 DisplayPort (DP) Cable,以兩種配置之一傳輸多個顯示器視訊訊號
* MST 集線器:將一條 DP Cable 分割為多個視訊輸出,可以是 DP 格式或其他格式。
* 菊鏈 Daisy Chain:監視器是連續連網的。除了最後一個,所有監視器都需要菊鏈 (Daisy Chain)相容。
SST (Single-Stream Transport) 是什麼?
SST 模式僅允許一個顯示器視訊訊號
Mac 如何手動選擇畫面輸出的解析度?
- 從「蘋果」選單,選擇「系統偏好設定」。
- 按一下「顯示器」圖像。
- 按住 Option 鍵的同時按一下「縮放」,查看第二部顯示器的其他解析度。

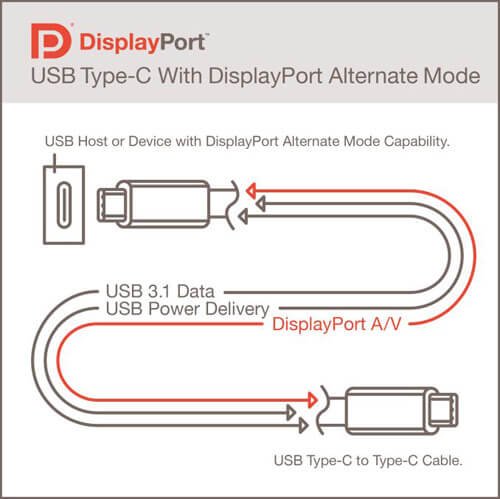
什麼是 DP alt mode? (DisplayPort Alternate mode)
DisplayPort Alternate Mode on USB Type-C (簡稱 DP alt mode),簡單來說就是未來可以通過一根USB Type-C數據線達成DisplayPort信號傳輸以及供電的目的。
什麼是 USB Type-C 介面?
USB Type-C,又稱USB-C,是一種通用序列匯流排的硬體介面形式,外觀上最大特點在於其上下端完全一致,與Micro-USB相比不再區分USB正反面。 USB Type-C規範1.0由USB開發者論壇發布,並於2014年8月完成。與USB 3.1規格大致相同。

USB Type-A Type-B Type-C 有什麼區別?
USB-A (Type-A) 是到現在都使用都還非常廣汎的接口 。USB 接口是分公母的,但 A 類接口的公母都相同,所以很難看到有用兩端 USB A 連接的設備。這種接口主要存在于電腦上,用來控制 USB 規格的數據傳輸。
USB-B (Type-B) 主要用於數據的「上傳」,一般能在可移動的設備「但又不那麽容易移動」上用到,比如印表機、掃描器、外置硬碟等等。
USB-C (Type-C) 解決了 USB-A/B 正反面插入的「世紀難題」,在體積與蘋果公司 iPhone 的 Lightning 介面相當的情況下還能提供更快的傳輸速度。它的傳輸規格被歸類到 USB 3.1 ,比起 USB 3.0 要快上一倍,達到驚人的 10GBit/s,最高能夠提供 100W 的電量,所以你能用一根 USB-C 數據線同時為顯示器和Notebook供電,與此同時它的使用壽命增加到了 10,000 插拔,即使是同一根綫用於不同設備,需要頻繁插拔也不需要擔心它會損壞。
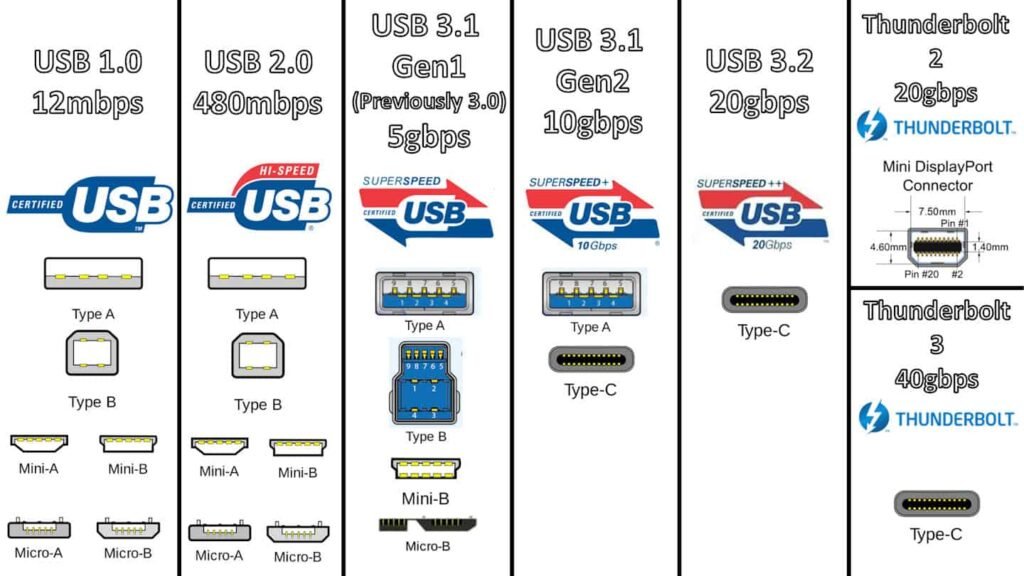
USB Gen 1 Gen 2 和 USB 3.0 3.1 3.2 有什麼關係?
USB 3.1 Gen 1 與 USB 3.1 Gen 2 之比較
USB 3.1 Gen 1 及 USB 3.1 Gen 2 僅在速度上有所不同。USB 3.1 Gen 1 支援高達 5Gbit/s 的速度,而 USB 3.1 Gen 2 支援高達 10Gbit/s 的速度。USB-IF 打算使用不同名稱來稱呼 USB 3.1 Gen 1 和 USB 3.1 Gen 2,以便產品行銷。通常,產品會對其規格表新增 5Gbps 或 10Gbps 的速度,以便在兩個 USB 標準之間作出區隔。業界其他公司則稱呼它們為「USB 3.1 Gen 1」或「USB 3.1 Gen 2」。
| USB 3.2 Gen 1×1 | USB 3.2 Gen 1×2 | USB 3.2 Gen 2×1 | USB 3.2 Gen 2×2 | |
| 傳輸速度 | 5Gbps | 10Gbps | 10Gbps | 20Gbps |
| 先前名為 | USB 3.1 Gen 1 及 USB 3.0 | — | USB 3.1 Gen 2 | — |
| 介面選項 | USB-A、 USB-C、 microUSB | 僅限 USB-C | USB-A、 USB-C、 microUSB | 僅限 USB-C |
閱讀相關文章: Mac 如何 設定 畫面輸出 解析度 ?
閱讀相關文章: Mac 外接螢幕, 解析度 怎麼 調整 ?
推薦文章
相關產品
影片介紹
How to Set Up Dual Monitors On a Mac
Once you’ve obtained a monitor for your MacBook or two monitors for a desktop Mac like a Mac Mini, you’ve verified your Mac can handle the monitors, and you have either the necessary cables and adapters, you’re ready to set up dual monitors on your Mac.
Here’s how to set up dual monitors on a Mac:
- Connect the monitor to the Mac using the appropriate cable and adapters if necessary.
- Position your monitors and Mac where you want them on your desk.
- Turn on your Mac. It will automatically detect and activate the second monitor, although the settings may not be to your liking.
- Click the Apple menu icon.
- Click System Preferences
- Click Displays.
- On your main display, click Arrangement.
- On your main display, make sure the mirror displays box is unchecked.
- On your main display, you’ll see a diagram showing the positioning of your displays. If they’re not positioned correctly, locate the secondary monitor icon.
- Click and drag the secondary monitor into the correct position.
- Release your mouse or trackpad, and the secondary monitor will drop into the position you chose.
- Your monitors are now ready to use, but you may need to configure the new monitor. Make sure the image doesn’t look stretched, squashed, discolored, or anything. If it doesn’t look right, click Scaled.
- Click the correct resolution for your display.
- If your second display looks right, you can close the display settings and start using your Mac.


